

Escale o seu desenvolvimento visual globalmente sem código backend.
O Webflow é a plataforma principal para desenvolvimento visual, mas a localização nativa pode ser complexa e dispendiosa. O MultiLipi integra-se diretamente na arquitetura do Webflow através de uma única injeção de script, transformando instantaneamente as suas páginas estáticas e coleções CMS em Infraestrutura multilíngue com indexação SEO completa.
Este guia detalha o processo de integração usando o Webflow Código Personalizado funcionalidade.
1. Pré-requisitos para o desdobramento
Antes de começar, certifique-se de que o seu ambiente cumpre os requisitos:
Plano do Local Webflow
Deves estar num Plano Básico do Local (ou superior) para desbloquear a funcionalidade "Código Personalizado".
Chave API MultiLipi
Localize isto no seu Painel abaixo Cenários > Gerais.
2. Passo 1: Arquitetura do Sítio de Acesso
Vamos injetar o motor de tradução no cabeçalho global para garantir que persiste em todas as páginas e modelos CMS.
- 1
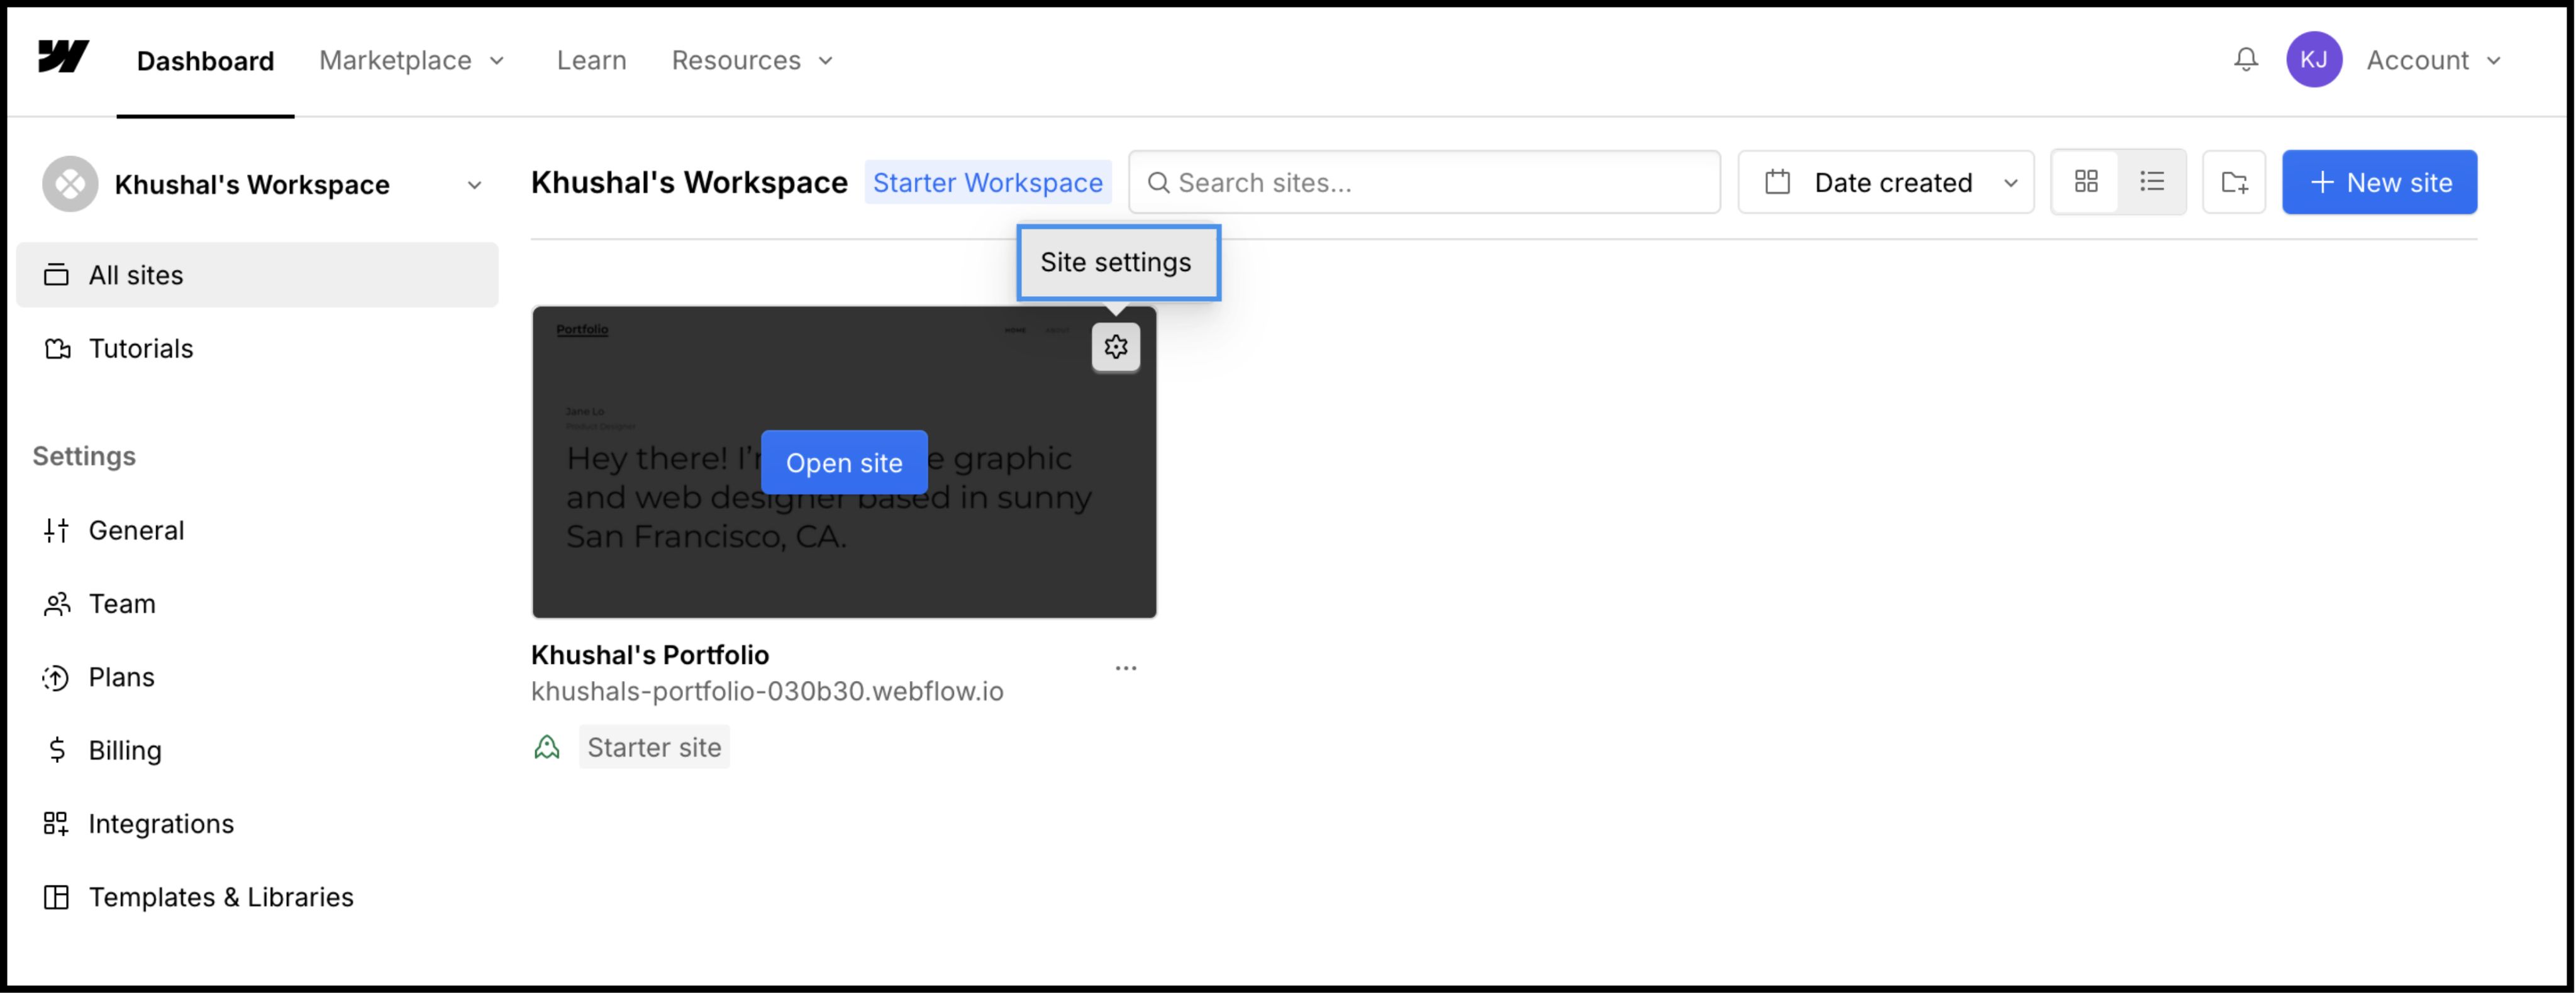
Inicie sessão no seu Painel Webflow.
- 2
Localize o seu cartão de projeto e clique no Ícone de Definições (⚙️) (ou selecionar Configurações do Site do menu Designer).
- 3
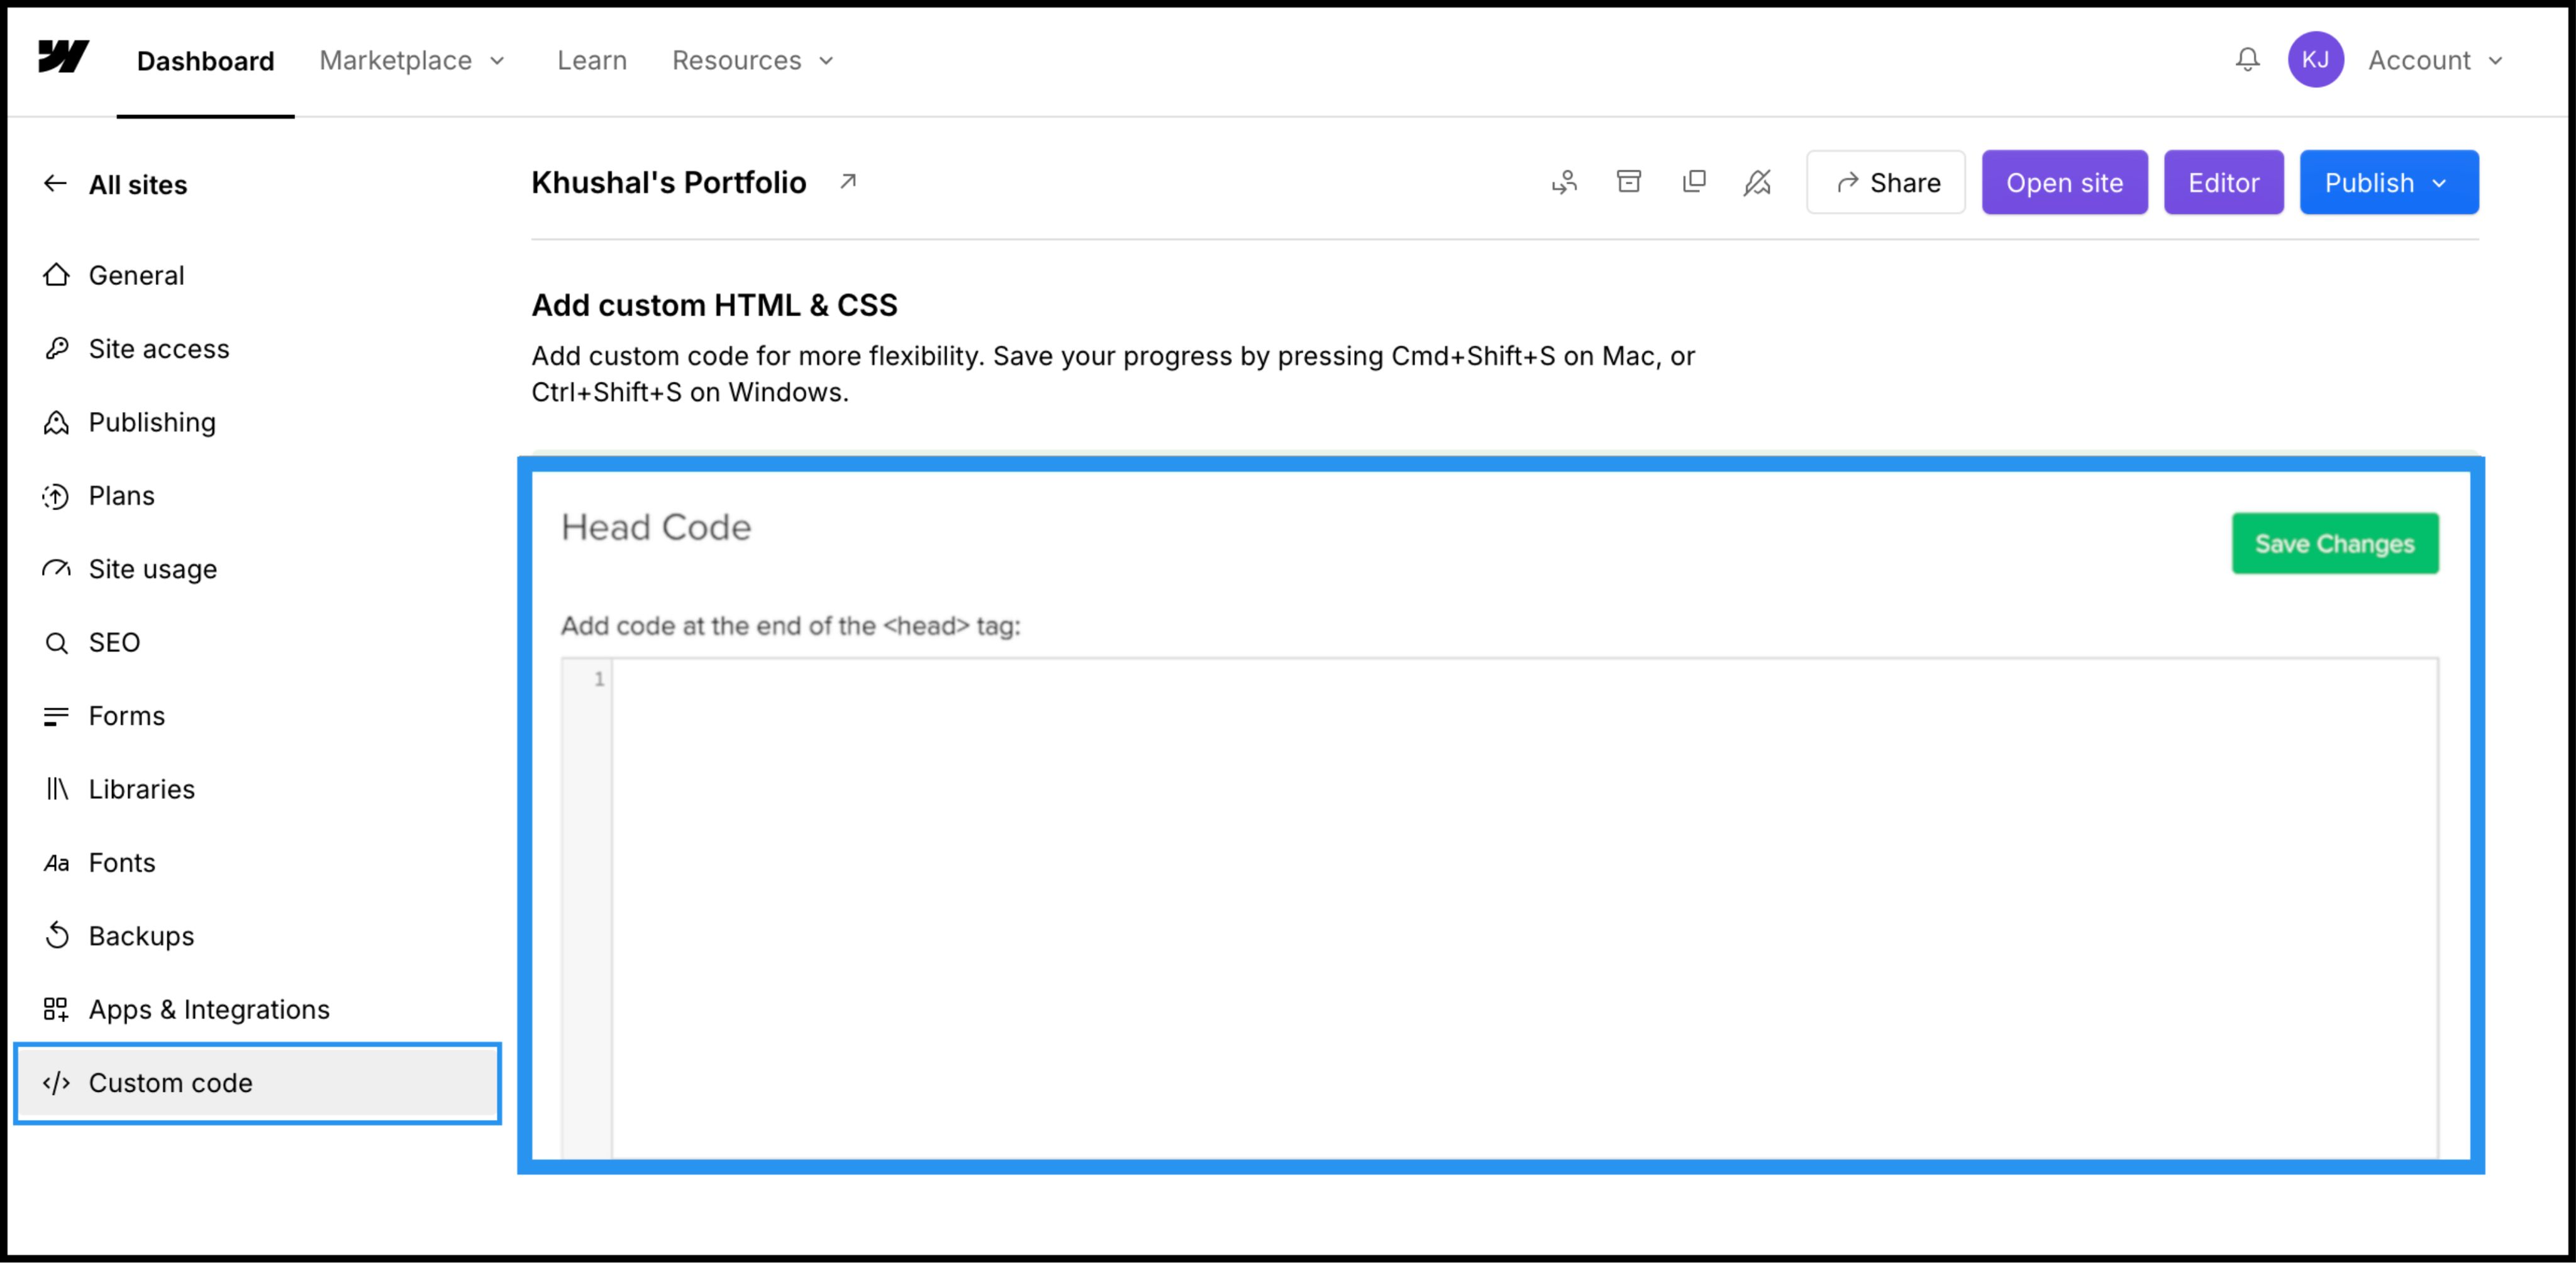
Navegue até ao Código Personalizado separador na barra de navegação superior.
3. Passo 2: Injetar o Script de Infraestrutura
- 1
Desça até ao campo identificado "Head Code".
- 2
Observação: Não coloque isto em "Código de rodapé", pois isso atrasará o carregamento da tradução e causará um "flash de conteúdo não traduzido."
Ação: Colar o Script de Ligação
Cole o seguinte script de ligação no campo:
⚠️ Configuração Crítica
- •Substituir
YOUR_API_KEY_HEREcom a API Key real copiada do seu painel MultiLipi. - •Clica no verde Guardar alterações no canto superior direito.
4. Passo 3: Implementação e Verificação
O Webflow não executa código personalizado na vista Designer. Tem de publicar para ver o motor em ação.
Publicar
Clique no azul Publicar botão e selecionar o seu domínio de produção (ou .webflow.io domínio de encenação).
Verificar
Abre o link em direto.
Verificação Visual
O Language Switcher deve aparecer no canto inferior esquerdo.
Verificação CMS
Navegue até uma página de Coleção CMS (por exemplo, /blog/post-1) e mudar de língua para garantir que o conteúdo dinâmico é traduzido corretamente.
Protocolo de Resolução de Problemas
- •Switcher em falta? Confirma que publicaste o site depois de guardares o código.
- •Verificação do Plano: Certifique-se de que o seu plano de alojamento Webflow está ativo; Os sites de staging gratuitos frequentemente limitam a execução de código personalizado em domínios personalizados.
5. Otimização e Estilização
Uma vez implementado, o MultiLipi funciona silenciosamente em segundo plano.
Integridade de Design
Como só trocamos nós de texto, as suas Interações Webflow (IX2) e as animações de scroll mantêm-se perfeitamente intactas.
Personalização do Switcher
Pode reposicionar o switcher usando as definições do nosso Dashboard ou sobrescrever o CSS para corresponder à tipografia específica do seu site.
Automação SEO
Geramos automaticamente o sitemap.xml Entradas e Hreflang etiquetas para o seu projeto Webflow, garantindo que se posiciona nos resultados de pesquisa globais sem necessidade de trabalho manual de SEO.