Como editar suas traduções no MultiLipi
Editing your website’s translations ensures that the tone, terminology, and context match your brand voice and local market expectations. MultiLipi offers two powerful ways to manage and fine-tune translations: via the Manual Editore o Visual (Live) Editor. Ambos os métodos permitem visualizar e publicar alterações instantaneamente.
Method 1: Edit Translations Using the Manual Editor
The Manual Editor gives you a structured interface to update all translated content across your site. Follow these steps to edit:
Etapa 1: Acessar o painel do projeto
Inicie sessão na sua conta MultiLipi e navegue até à barra lateral. Clique em "Projetos" to view the list of websites you've added for translation.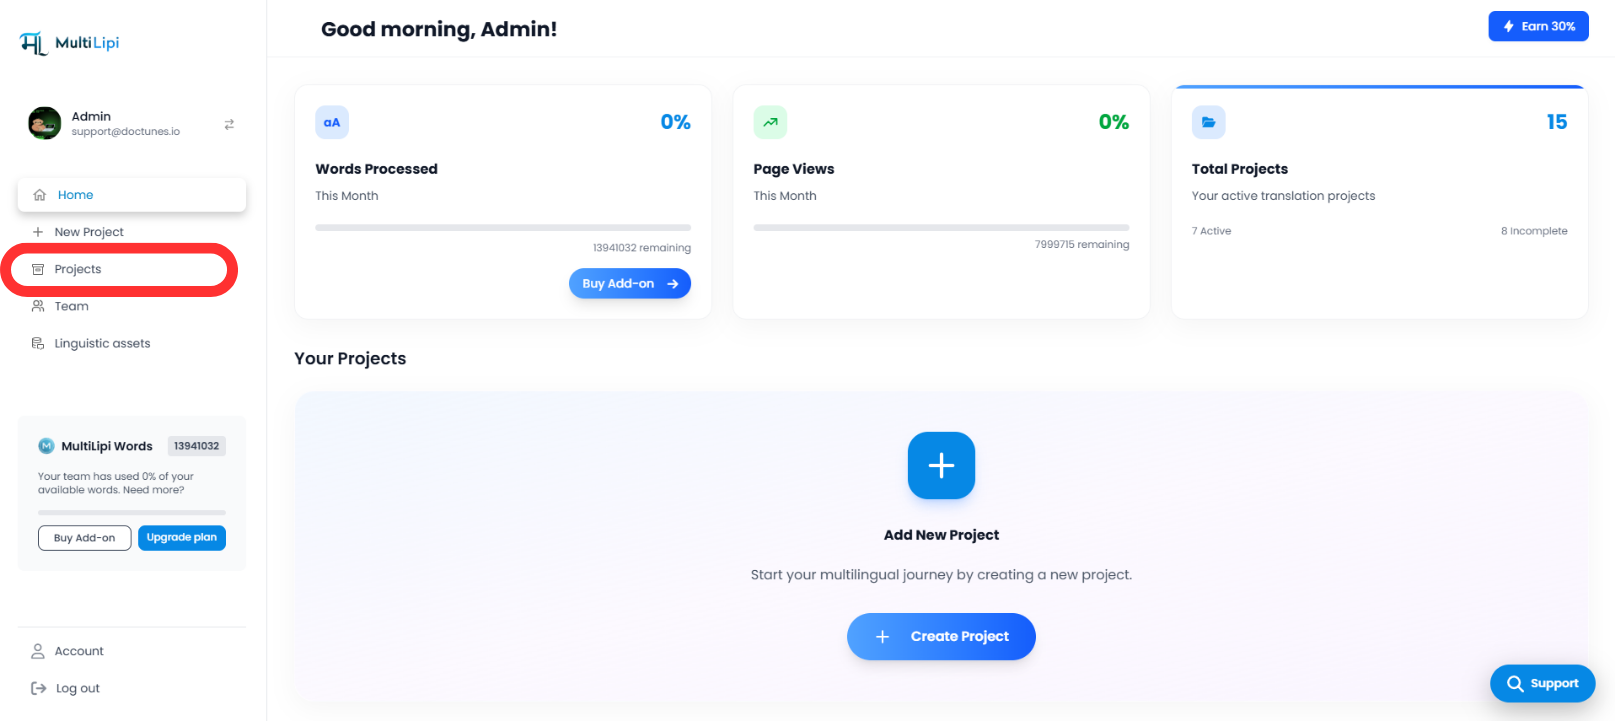
Step 2: Choose the Project to Edit
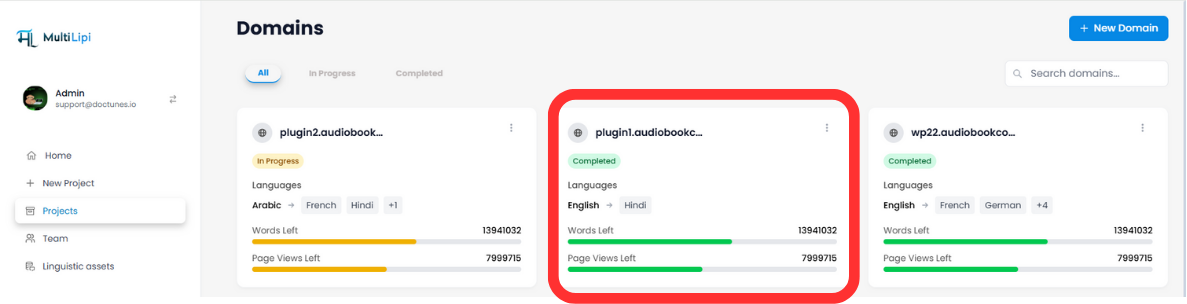
From the project list, identify the domain you want to edit. Click your preferred project, This will open up the language editing dashboard for that domain.
Step 3: Select Language to Edit
Within the project, choose the specific target language you want to work on. You’ll now be able to see a full list of all source content alongside their translated versions.
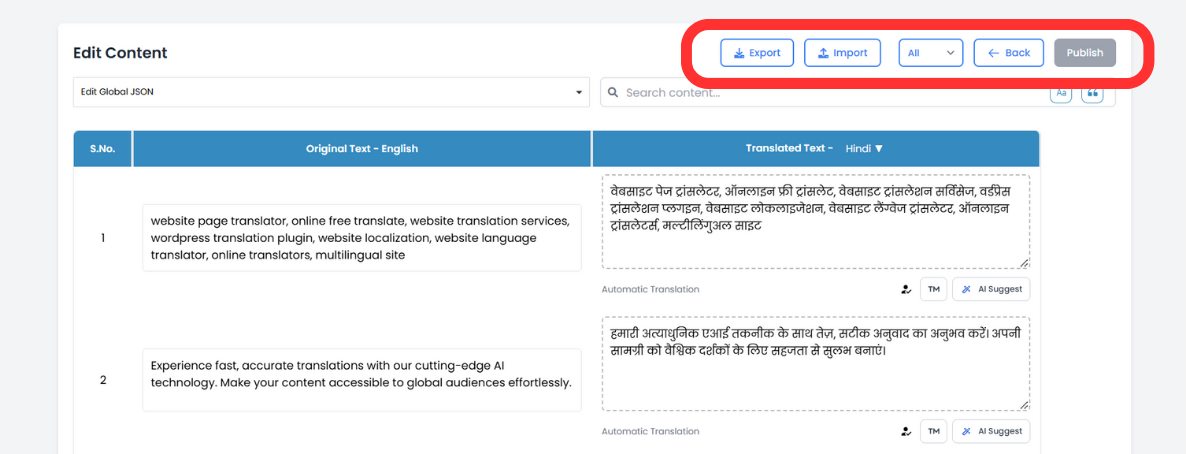
Step 4: Edit Your Translated Content
Click inside the editable translation box to make changes. This allows you to correct errors, adjust tone, or add SEO keywords as needed. You can also search specific text using the top search bar to jump directly to the phrase you want to update.
💡 Now Enhanced with AI Suggestions
When editing, you’ll now see AI-powered suggestions below each field based on the latest SEO trends and brand tone. These suggestions are tailored to improve readability, keyword performance, and localization accuracy.
Step 5: One-Click Content Replacement
Found a better phrasing? Use the “One-Click Replace” option to instantly insert the AI suggestion or your own pre-approved glossary content into the editor field.
Step 6: Publish the Updated Translations
After completing your edits, don’t forget to hit the "Publicar" button located at the top-right. This will apply your changes live on your multilingual site instantly.
🌍 Method 2: Edit Using the Visual (Live) Editor
The Visual Editor allows you to make contextual edits while viewing how the translated text appears directly on your website layout — perfect for UI/UX-sensitive content.
Passo 1: Navegue até "URLs" em Traduções
Na barra lateral esquerda do seu painel, vá para "Traduções" e, em seguida, selecione "URLs." Esta seção exibe todos os sub-URLs e seus status de tradução. 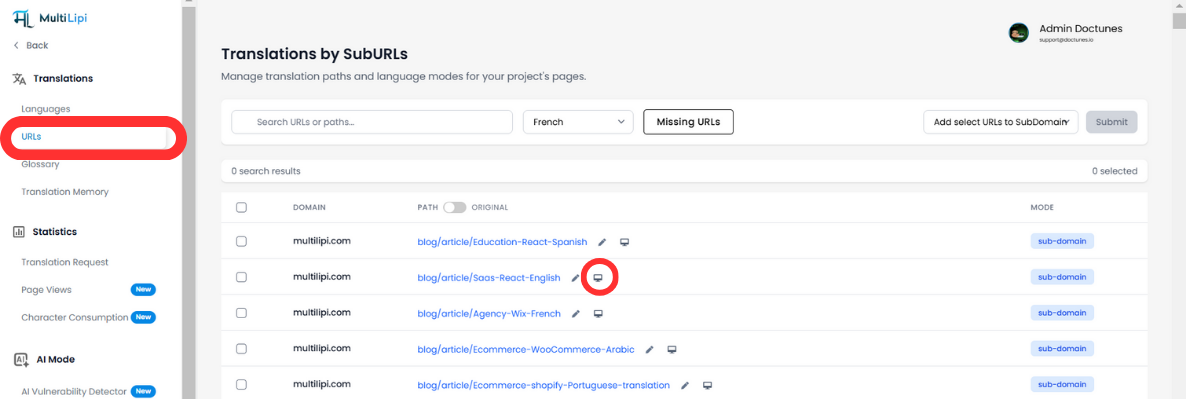
Step 2: Launch the Visual Editor
Next to the page URL you wish to edit, click the Visual Editor icon (🖉 inside a monitor). Isso abre uma visualização ao vivo da sua página no idioma selecionado.
Step 3: Edit Translations Directly on the Page
Click any translated text element to launch the inline editor. You can see real-time spacing, alignment, and formatting so your edits don’t break the layout.
✨ New: AI-Powered Enhancements in Visual Editor
- Instantly get AI suggestions contextualized to the page’s layout
- Click-to-edit image alt tags directly in the live preview
- Utilização one-click content suggestions for headlines and CTAs
- Smart detection of misaligned copy or broken translations
- Candidatar-se content tone or formality tweaks using AI tone sliders
Etapa 4: revisar e publicar suas alterações
After making updates, click "Publicar" to push them live. You can switch between languages using the top dropdown and continue editing in other locales.
📌 Resumo
Notas Finais:
-
Both editors support real-time publishing for instant updates.
-
Glossary terms auto-fill as you edit, ensuring consistent terminology.
-
Utilize a seringa Manual Editor for bulk structured changes.
-
Utilize a seringa Visual Editor for UI-sensitive and in-context edits.
-
New AI tools, image alt tag support, and one-click replacements are available in both editors to improve quality and productivity
Observações